I had quite a burst of activity the last couple of days. I got the retro Apache out and solved a few problems which allowed me to proceed quickly. It's been very rewarding to see the new version looking better than the first.
First of all I built the side sponsons out a little wider than the kit and much longer.

This left me with an issue dealing with the underside. It sat this way for a week plus before I tried some very thin polystyrene from a cookie container.

I had already decided to use the ring shaped sprue found in the middle of the tree the parts come on in several different manufactures kits. I found two alike and sanded down the outside and dremeled and filed and sanded out the middle to make a reasonable airfoil shape. This I cut apart to make two struts from each ring. I made them extra long on purpose and trimmed them once installed. Some Evergreen rod provided the skis with the front heated and bent to shape then cut to length. I drilled holes just big enough to fit the strut and with a little trimming I was able to slip them in far enough to give the right stance. On the pic above you can see how far they fit into the sponson in the rear position. This way they are unlikely to break off in the future.

I sanded the ends of the struts on some course sandpaper until they all touched the desktop at the same time. Adding the skis was a snap after this. I also added some CA glue to the holes as there were a couple gaps.

I added the wings and engines after all this had dried overnight. I also checked to see if the weapons setup would still work. I'll still add the four .50 cals in the nose and something heavier in the sponsons.

This is the tail rotor and P-40 horizontal stabilizers installed temporarily. I'm going to use the stabs from the second P-40 kit as these are messed up from the paint stripping. I've since rounded off the top of the vertical stabilizer to give it some more 1940's look. The rings are what I made the struts out of. Came out pretty nice if I say so myself. I've since added a tail skid made from the wire from a paper clip and CA'ed into a hole I drilled.

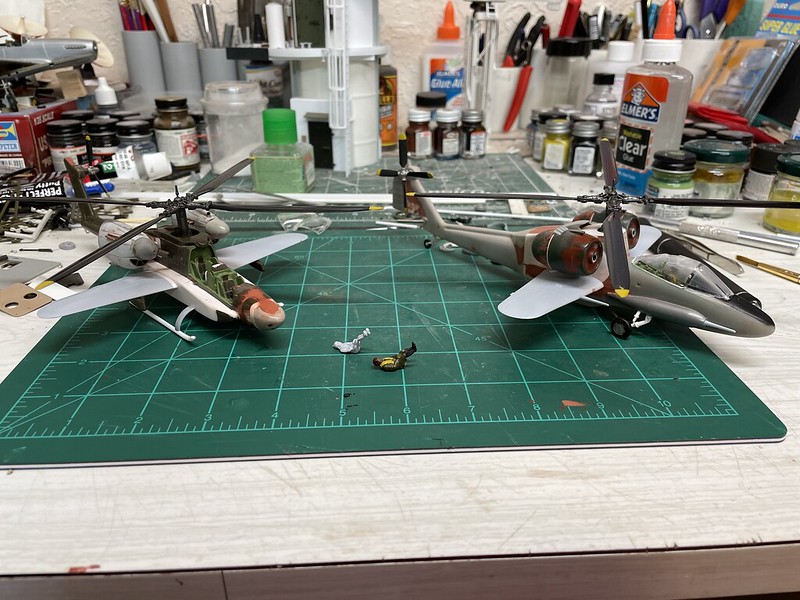
Just an overhead shot. The engines are the only thing saved from the first attempt as the paint stripping in brake fluid really didn't clean things up that well. And I had extras of everything else anyway.

I'm thinking of cutting the canopy sides open. I can practice on the first kits canopy as the paint striping made a mess of it anyway. Not much more to do and then I'll have to paint. Pray for me.
Here's what I'm talking about when it comes to painting. I painted the tips of the rotors zinc chromate yellow as I think it gives a little weathered and "scale" appearence. Then I masked them off and sprayed the rotors black. I was touching up the yellow rotor tips when the brush touched the mask line. The yellow "broke through" the mask line and spilled out onto the black in this little spiderweb line. It did it on another rotor blade too. Nothing strange about the paints, not old and both enamels so go figure. Just the kind of weird stuff that happens when I paint. I'll have to take an extra anxiety pill first.

So that's the latest on this project. With luck I may have these and the Seahog done in time for my club's show and contest in October!


